
Happy Swiftmas! Today is the very first day of our #The12DaysOfSwiftmas coding challenge.
If you have no idea what swiftmas is, then check out this post to learn more.
Today’s prompt:
So if you have no idea where to start with this challenge, have no fear! I will be sharing my version here & available on GitHub for you to download/clone & play around with. This way you can learn as you go with a tutorial & use the project as a guide if things go awry.
You can find the swiftmas GitHub here, updated each day with the next project: https://github.com/thecodingsprite/Swiftmas-2023
So where did I start with this one, I knew I wanted a countdown but what kind of countdown? A days, hours & minutes one, a visual one with graphics… I mean the ideas are endless with a prompt arent’ they!
I figured Id start slow, I was looking for festive background images to stash away for any time I may need them during this challenge. Upon this search came my inspiration…an advent calendar printable (Vector File) that I knew I could re-purpose as a really cute looking UI.
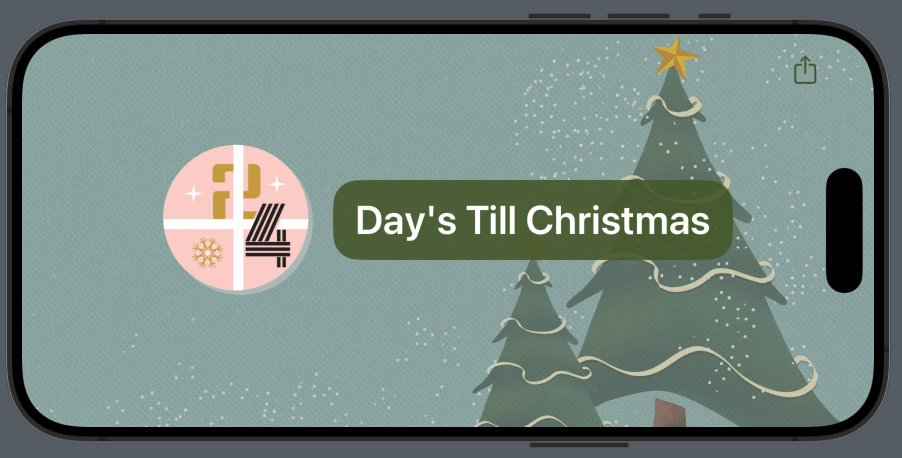
So this had set the stage for a simple countdown using just days, as graphically I wanted it to display a cute looking view. So I set to work. Edited the images all ready, imported these into my Xcode project & to slowly get my brain into the mood I purely worked on the visuals of the app. Just setting up the UI. I figured I can implement the logic a bit later on. This is how my code began & the design of the UI was staged.
import SwiftUI

struct ContentView: View {
    var body: some View {

         ZStack {
            Image("bg")
                .resizable()
                .aspectRatio(contentMode: .fill)
                .ignoresSafeArea()
                .opacity(0.7)

            // Darken bg
            Color(.black)
                .ignoresSafeArea()
                .opacity(0.2)

            // Countdown Days
            HStack(spacing: 20) {

                // TODO: Implement logic dynamic on days left
                Image("12")
                    .resizable()
                    .aspectRatio(contentMode: .fill)
                    .frame(width: 150, height: 150)

                // Text design
                ZStack {
                    RoundedRectangle(cornerRadius: 25.0)
                        .foregroundStyle(Color(red: 69/255, green: 87/255, blue: 42/255))
                        .opacity(0.9)
                        .frame(width: 400, height: 80)

                    Text("Day's Till Christmas")
                        .font(Font.system(size: 40))
                        .bold()
                        .foregroundStyle(.white)
                }
            }
        }
    }
}
I hardcoded an image in place so I could get the design just right. Knowing I would make this dynamic based on the countdown logic a little later on.
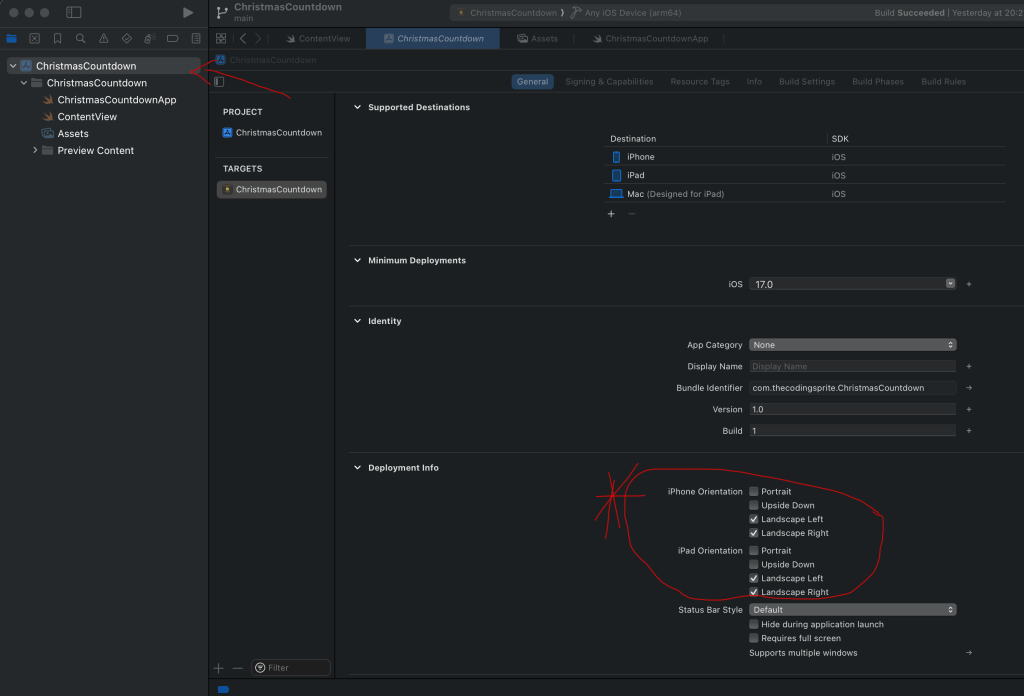
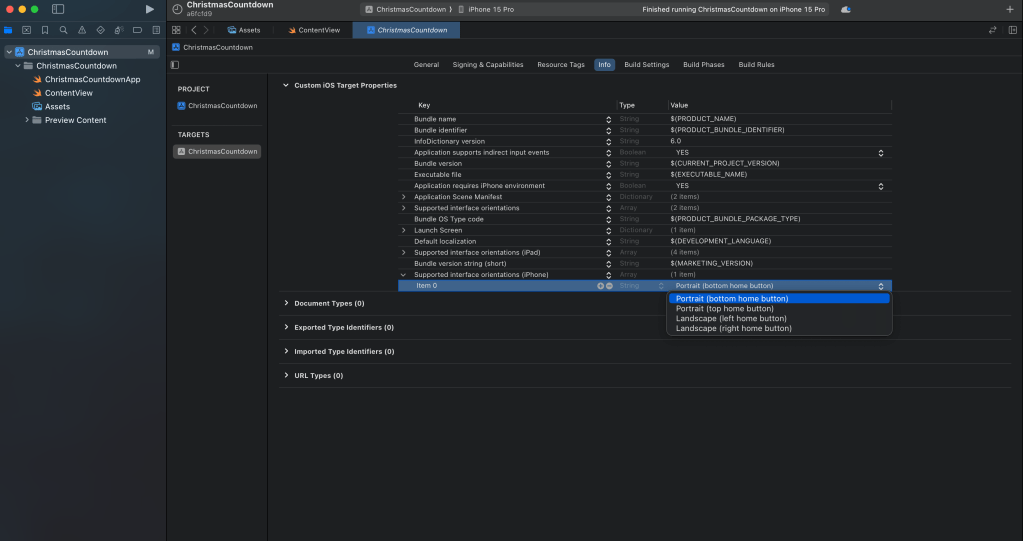
The next thing to note is I set the app to horizontal mode only. If you have never done this before it can be daunting but is super easy. There are a few ways, but the most simple way is to simply click on your project in the file navigator > then uncheck the other orientations for both iPhone & iPad.
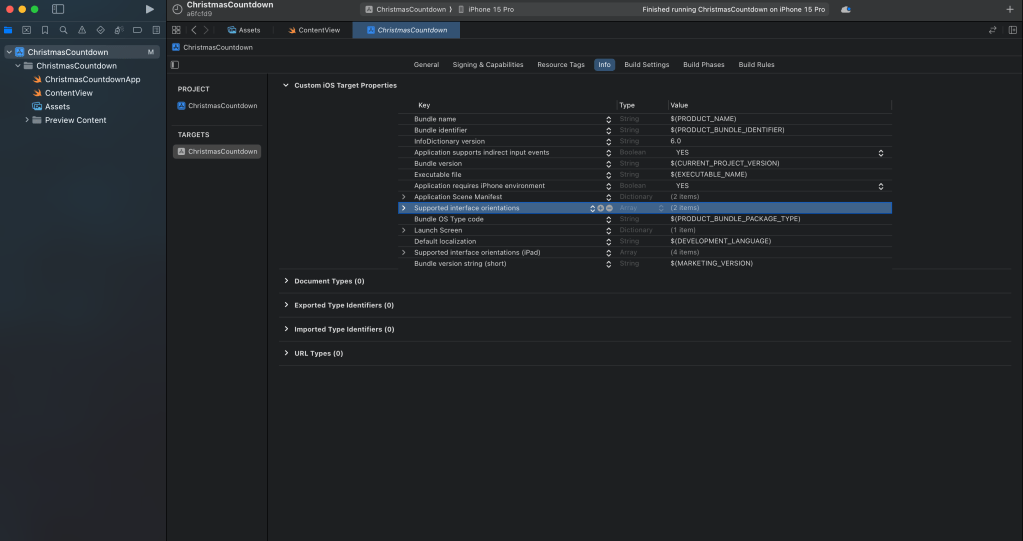
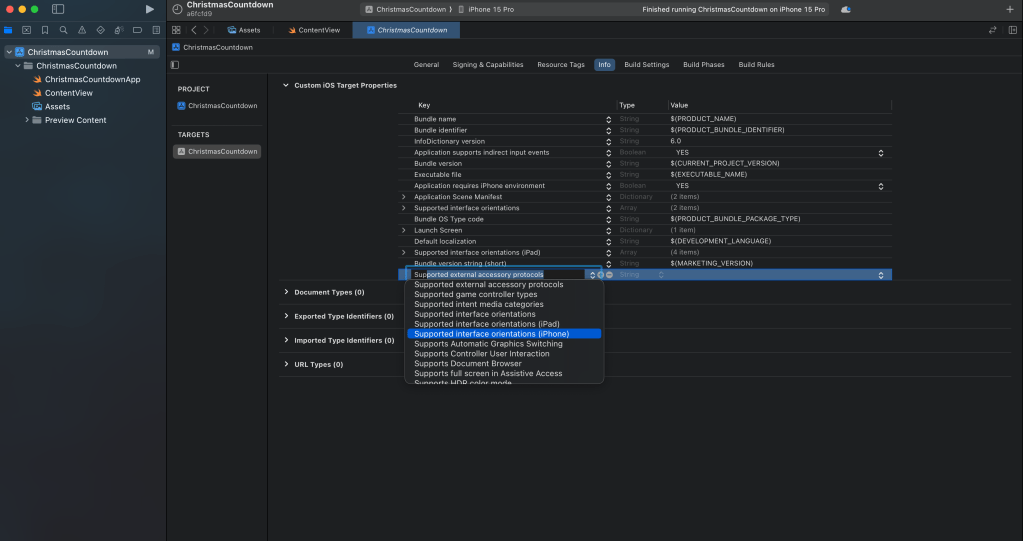
This should work as long as you do both the iPad & the iPhone. But if this doesn’t work then you will need to add a section to your info.plist as below.
So now we work on the logic. We will need a variable that can refresh the state as it’s updated for the image selection.
@State var daysLeftTillChristmas = 0Now we change the image call…
// Change Image("12) to:

Image("\(daysLeftTillChristmas)")
Now the countdown logic… I put this in a function so it was easy to call within .onAppear{}
  func countdown() -> Int {

        // create date components of 12/24
        let christmasComponents = DateComponents(month: 12, day: 25)

        // get next christmas date
        let nextChristmas = Calendar.current.nextDate(after: Date(), matching: christmasComponents, matchingPolicy: .strict)!

        // calculate number of days left
        let daysLeft = Calendar.current.dateComponents([.day], from: Date() , to: nextChristmas).day!

        return daysLeft
    }

// Add this onAppear to the very 1st ZStack

.onAppear {
            daysLeftTillChristmas = self.countdown()
        }
The fully functioning app code should now look like this:
struct ContentView: View {

    @State var daysLeftTillChristmas = 0

    var body: some View {
        ZStack {
            Image("bg")
                .resizable()
                .aspectRatio(contentMode: .fill)
                .ignoresSafeArea()
                .opacity(0.7)

            // Darken bg
            Color(.black)
                .ignoresSafeArea()
                .opacity(0.2)

            // Countdown Days
            HStack(spacing: 20) {

                // Implement logic dynamic on days left
                Image("\(daysLeftTillChristmas)")
                    .resizable()
                    .aspectRatio(contentMode: .fill)
                    .frame(width: 150, height: 150)


                // Text design
                ZStack {
                    RoundedRectangle(cornerRadius: 25.0)
                        .foregroundStyle(Color(red: 69/255, green: 87/255, blue: 42/255))
                        .opacity(0.9)
                        .frame(width: 400, height: 80)

                    Text("Day's Till Christmas")
                        .font(Font.system(size: 40))
                        .bold()
                        .foregroundStyle(.white)
                }
            }
        }
        .onAppear {
            daysLeftTillChristmas = self.countdown()
        }

    }


    func countdown() -> Int {

        // create date components of 12/24
        let christmasComponents = DateComponents(month: 12, day: 25)

        // get next christmas date
        let nextChristmas = Calendar.current.nextDate(after: Date(), matching: christmasComponents, matchingPolicy: .strict)!

        // calculate number of days left
        let daysLeft = Calendar.current.dateComponents([.day], from: Date() , to: nextChristmas).day!

        return daysLeft
    }

}
Fancy taking things a step harder?
Well why don’t we add a share button…I must admit this is new to me & I am grateful for other bloggers posting about this. The syntax has been updated for the latest iOS versions but I can’t seem to get it quite right so for the sake of time & a speedy challenge I have stuck with the deprecated syntax. (it still works on devices running iOS 17, I have checked)
So going back over the code I also wanted to tidy things up…so I added a color set to assets for the color we have been using, it just looks way less messy. The hex version is: #45572a if you wanted to do the same. Then after naming that colour: “buttons” I could tidy the foregroundStyle:
// Change from: .foregroundStyle(Color(red: 69/255, green: 87/255, blue: 42/255)) to

.foregroundStyle(Color("buttons"))
Next I added a button in the top right corner. Don’t worry about the action we will be making this next.
// Share button
            VStack {
                HStack() {

                    Spacer()

                    Button(action: shareButton) {
                        Image(systemName: "square.and.arrow.up")
                            .foregroundStyle(Color("buttons"))
                            .scaleEffect(1.5)
                    }
                }

                Spacer()
            }
            .padding(.top, 50)
Now the function for that button:
 /// Credit: /www.boltuix.com taught me this
    func shareButton() {
            let url = URL(string: "https://www.thecodingsprite.com/")
            let activityController = UIActivityViewController(activityItems: [url!], applicationActivities: nil)

            UIApplication.shared.windows.first?.rootViewController!.present(activityController, animated: true, completion: nil)
    }
The complete functional code is at the bottom of this post.
Now we have a fully working app squeeee
See you tomorrow for Day 2!
Complete Code
import SwiftUI

struct ContentView: View {

    @State var daysLeftTillChristmas = 0

    var body: some View {
        ZStack {
            Image("bg")
                .resizable()
                .aspectRatio(contentMode: .fill)
                .ignoresSafeArea()
                .opacity(0.7)

            // Darken bg
            Color(.black)
                .ignoresSafeArea()
                .opacity(0.2)

            // Countdown Days
            HStack(spacing: 20) {

                // TODO: Implement logic dynamic on days left
                Image("\(daysLeftTillChristmas)")
                    .resizable()
                    .aspectRatio(contentMode: .fill)
                    .frame(width: 150, height: 150)


                // Text design
                ZStack {
                    RoundedRectangle(cornerRadius: 25.0)
                        .foregroundStyle(Color("buttons"))
                        .opacity(0.9)
                        .frame(width: 400, height: 80)

                    Text("Day's Till Christmas")
                        .font(Font.system(size: 40))
                        .bold()
                        .foregroundStyle(.white)
                }
            }

            // Share button
            VStack {
                HStack() {

                    Spacer()

                    Button(action: shareButton) {
                        Image(systemName: "square.and.arrow.up")
                            .foregroundStyle(Color("buttons"))
                            .scaleEffect(1.5)
                    }
                }

                Spacer()
            }
            .padding(.top, 50)
        }
        .onAppear {
            daysLeftTillChristmas = self.countdown()
        }

    }


    func countdown() -> Int {

        // create date components of 12/24
        let christmasComponents = DateComponents(month: 12, day: 25)

        // get next christmas date
        let nextChristmas = Calendar.current.nextDate(after: Date(), matching: christmasComponents, matchingPolicy: .strict)!

        // calculate number of days left
        let daysLeft = Calendar.current.dateComponents([.day], from: Date() , to: nextChristmas).day!

        return daysLeft
    }

    /// Credit: /www.boltuix.com taught me this
    func shareButton() {
            let url = URL(string: "https://www.thecodingsprite.com/")
            let activityController = UIActivityViewController(activityItems: [url!], applicationActivities: nil)

            UIApplication.shared.windows.first?.rootViewController!.present(activityController, animated: true, completion: nil)
    }

}