Who doesn’t love holding a hot cup of something at this time of year?
Happy Swiftmas Eve 😉

For the Eleventh prompt, we have Hot Drinks. What will you create?
I’m looking forward to seeing what you come up with today. Knowing how busy this time of year is, for the last two days I’m going to include the tutorial with the prompt…so spoiler alert…don’t scroll past this point if you don’t want the tutorial & sample project just yet!
Build a Hot Drink Customizer in SwiftUI
Happy Eve of Swiftmas End! We are going a bit deeper within our code today before a fun last day tomorrow.
Warm up your day with a Hot Drink Customizer App! This app guides users through selecting a hot drink, adding extras, and customizing their experience. It’s a great way to learn how to build an interactive SwiftUI app with dynamic views and state management.
What You’ll Learn
- Building a multi-step app flow using
@State. - Displaying content dynamically based on user actions.
- Reusing UI components with helper functions.
- Styling buttons and images for a polished user experience.
Getting Started
1. Set Up Your Project
You can find the sample project in the GitHub repository here
For this project I personally created an illustration of a drink. The layers have all been sized and placed for easy layering. You can download them below.
Create a new SwiftUI project in Xcode:
- Open Xcode and select Create a new project.
- Choose the App template, click Next.
- Enter your project name (e.g., “HolidayRecipeFinder”), set the interface to SwiftUI, and click Create.
Step 1: Define the App State
To manage the user’s choices (e.g., drink type and extras), we’ll use @State variables. These variables will also help track the app’s current step in the flow.
Code Snippet: State Variables
@State private var hasTea = false
@State private var hasCoffee = false
@State private var hasChocolate = false
@State private var hasMarshmallows = false
@State private var hasWhippedCream = false

@State private var questionTrack = 0
Explanation:
- Drink Selections: Boolean variables (
hasTea,hasCoffee,hasChocolate) track the user’s drink choice. - Extras: Additional selections (
hasMarshmallows,hasWhippedCream) for customizing the drink. questionTrack: Keeps track of the current step in the flow.
Step 2: Create a Multi-Step Flow
We’ll use a switch statement on questionTrack to control the displayed content. Each value of questionTrack corresponds to a specific step in the app.
Code Snippet: Multi-Step Flow
switch questionTrack {
case 0:
    yesNoButtons
case 1:
    drinkButtons
case 2:
    extraButtons
case 3:
    enjoyView
case 4:
    goodbyeView
default:
    EmptyView()
}
Explanation:
- Each step has its own UI to keep things clean, there are many ways to achieve the same output so feel free to try building the end result your way:
- Yes/No Buttons (Step 0): Asks if the user wants a hot drink.
- Drink Buttons (Step 1): Lets the user select their drink.
- Extra Buttons (Step 2): Allows customization with extras.
- Enjoy View (Step 3): Displays the final message and a reset option.
- Goodbye View (Step 4): Shows a farewell message if the user declines.
Step 3: Adding Yes/No Buttons
The first step asks the user if they want a hot drink.
Code Snippet: Yes/No Buttons
private var yesNoButtons: some View {
    HStack(spacing: 20) {
        Button("Yes Please") {
            questionTrack = 1
        }

        Button("No Thanks") {
            questionTrack = 4
        }
    }
}
Explanation:
- Yes Button: Advances the flow to drink selection (
questionTrack = 1). - No Button: Skips to the goodbye message (
questionTrack = 4).
Step 4: Adding Drink Selection Buttons
Let the user choose between tea, coffee, or hot cocoa.
Code Snippet: Drink Buttons
private var drinkButtons: some View {
    HStack(spacing: 20) {
        drinkButton(title: "Tea", isSelected: $hasTea)
        drinkButton(title: "Coffee", isSelected: $hasCoffee)
        drinkButton(title: "Hot Cocoa", isSelected: $hasChocolate)
    }
}
Code Snippet: Reusable Drink Button
private func drinkButton(title: String, isSelected: Binding<Bool>) -> some View {
    Button(title) {
        isSelected.wrappedValue.toggle()
        questionTrack += 1
    }
    .padding(10)
}
Explanation:
- Reusable Button: The
drinkButtonfunction generates a button for each drink option. - Selection Handling:
- Toggles the corresponding
@Statevariable. - Advances the flow to the next step (
questionTrack += 1).
Step 5: Adding Extras
The next step lets users customize their drink with marshmallows and whipped cream.
Code Snippet: Extra Buttons
private var extraButtons: some View {
    HStack(spacing: 20) {
        drinkButton(title: "Marshmallows", isSelected: $hasMarshmallows)
        drinkButton(title: "Whipped Cream", isSelected: $hasWhippedCream)
    }
}
Explanation:
- Similar to the drink buttons, extras are handled with reusable buttons.
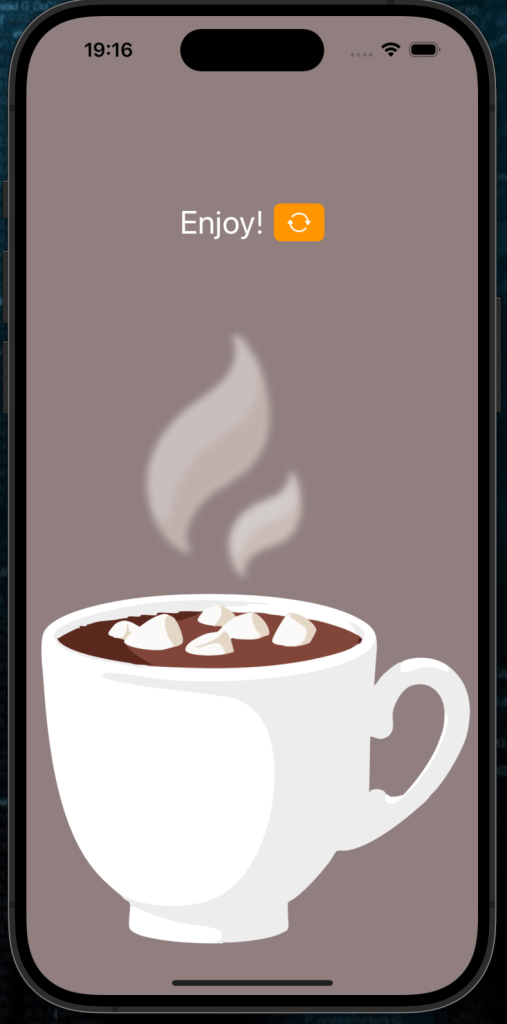
Step 6: Displaying the Final View
After customization, show the user a message and an option to restart.
Code Snippet: Enjoy View
private var enjoyView: some View {
    HStack {
        Text("Enjoy!")
            .font(.title)
            .foregroundStyle(.white)

        Button(action: reset) {
            Image(systemName: "arrow.triangle.2.circlepath")
        }
    }
    .padding(.horizontal)
}
Explanation:
- Message: Displays “Enjoy!” to indicate the end of the flow.
- Reset Button: Calls
reset()to start over.
Step 7: Displaying a Goodbye Message
If the user declines a drink, display a farewell message.
Code Snippet: Goodbye View
private var goodbyeView: some View {
    VStack(spacing: 20) {
        Text("Have a nice day")
            .font(.title)
            .foregroundStyle(.white)

        Button(action: reset) {
            Image(systemName: "arrow.triangle.2.circlepath")
        }
    }
}
Step 8: Visualizing the Cup
We’ll use a ZStack to layer images and display the user’s drink and extras.
Code Snippet: Cup View
private var cupView: some View {
    ZStack {
        Image("cup")
            .resizable()
            .aspectRatio(contentMode: .fit)

        if hasTea {
            Image("tea")
                .resizable()
                .aspectRatio(contentMode: .fit)
        }

        if hasCoffee {
            Image("coffee")
                .resizable()
                .aspectRatio(contentMode: .fit)
        }

        if hasChocolate {
            Image("cocoa")
                .resizable()
                .aspectRatio(contentMode: .fit)
        }

        if hasMarshmallows {
            Image("marshmallows")
                .resizable()
                .aspectRatio(contentMode: .fit)
        }

        if hasWhippedCream {
            Image("whipped-cream")
                .resizable()
                .aspectRatio(contentMode: .fit)
        }

        Image("steam")
            .resizable()
            .aspectRatio(contentMode: .fit)
    }
}
Explanation:
- Dynamic Images: Displays images for the selected drink and extras.
- Layering: Stacks multiple images (e.g., steam, drink, cup) for a complete visual.
Step 9: Resetting the App
Add a function to reset all selections and restart the flow.
Code Snippet: Reset Function
private func reset() {
    questionTrack = 0
    hasTea = false
    hasCoffee = false
    hasChocolate = false
    hasMarshmallows = false
    hasWhippedCream = false
}
Step 10: Adding Background and Styling
Let’s make the app visually appealing with a simple color background.
Code Snippet: Background Styling
.background(
    Color.bg // I have added a color set in assets for a custom color in this case. #917F7F
        .ignoresSafeArea()
)
Complete Code
Combine all the steps to create the final Hot Drink Customizer App.
import SwiftUI

struct ContentView: View {
    @State private var hasTea = false
    @State private var hasCoffee = false
    @State private var hasChocolate = false
    @State private var hasMarshmallows = false
    @State private var hasWhippedCream = false

    @State private var questionTrack = 0

    var body: some View {
        VStack(spacing: 20) {
            Spacer()

            // Display header based on the current question
            if questionTrack != 3 {
                Text(headerText)
                    .font(.title)
                    .foregroundStyle(.white)
            }

            Spacer()

            // Main content based on questionTrack
            switch questionTrack {
            case 0:
                yesNoButtons

            case 1:
                drinkButtons

            case 2:
                extraButtons

            case 3:
                enjoyView

            case 4:
                goodbyeView

            default:
                EmptyView()
            }

            Spacer()

            // Display the cup and its contents
            if questionTrack > 0 && questionTrack < 4 {
                cupView
            }
        }
        .buttonStyle(.borderedProminent)
        .tint(.orange)
        .frame(maxWidth: .infinity, maxHeight: .infinity)
        .background(
            Color.bg
                .ignoresSafeArea()
        )
    }

    /// Header text based on questionTrack
    private var headerText: String {
        switch questionTrack {
        case 0: return "Fancy a hot drink?"
        case 1: return "What kind?"
        case 2: return "Any Extras?"
        default: return ""
        }
    }

    /// Yes/No Buttons
    private var yesNoButtons: some View {
        HStack(spacing: 20) {
            Button("Yes Please") {
                questionTrack = 1
            }

            Button("No Thanks") {
                questionTrack = 4
            }
        }
    }

    /// Drink Selection Buttons
    private var drinkButtons: some View {
        HStack(spacing: 20) {
            drinkButton(title: "Tea", isSelected: $hasTea)
            drinkButton(title: "Coffee", isSelected: $hasCoffee)
            drinkButton(title: "Hot Cocoa", isSelected: $hasChocolate)
        }
    }

    /// Extras Selection Buttons
    private var extraButtons: some View {
        HStack(spacing: 20) {
            drinkButton(title: "Marshmallows", isSelected: $hasMarshmallows)
            drinkButton(title: "Whipped Cream", isSelected: $hasWhippedCream)
        }
    }

    /// Enjoy View
    private var enjoyView: some View {
        HStack {
            Text("Enjoy!")
                .font(.title)
                .foregroundStyle(.white)

            Button(action: reset) {
                Image(systemName: "arrow.triangle.2.circlepath")
            }
        }
        .padding(.horizontal)
    }

    /// Goodbye View
    private var goodbyeView: some View {
        VStack(spacing: 20) {
            Spacer()
            Text("Have a nice day")
                .font(.title)
                .foregroundStyle(.white)

            Button(action: reset) {
                Image(systemName: "arrow.triangle.2.circlepath")
            }
            Spacer()
        }
    }

    /// Cup View
    private var cupView: some View {
        ZStack {
            Image("cup")
                .resizable()
                .aspectRatio(contentMode: .fit)

            if hasTea {
                Image("tea")
                    .resizable()
                    .aspectRatio(contentMode: .fit)
            }

            if hasCoffee {
                Image("coffee")
                    .resizable()
                    .aspectRatio(contentMode: .fit)
            }

            if hasChocolate {
                Image("cocoa")
                    .resizable()
                    .aspectRatio(contentMode: .fit)
            }

            if hasMarshmallows {
                Image("marshmallows")
                    .resizable()
                    .aspectRatio(contentMode: .fit)
            }

            if hasWhippedCream {
                Image("whipped-cream")
                    .resizable()
                    .aspectRatio(contentMode: .fit)
            }

            Image("steam")
                .resizable()
                .aspectRatio(contentMode: .fit)
        }
    }

    /// Helper Button Generator
    private func drinkButton(title: String, isSelected: Binding<Bool>) -> some View {
        Button(title) {
            isSelected.wrappedValue.toggle()
            questionTrack += 1
        }
        .padding(10)
    }

    /// Reset the application state
    private func reset() {
        questionTrack = 0
        hasTea = false
        hasCoffee = false
        hasChocolate = false
        hasMarshmallows = false
        hasWhippedCream = false
    }
}
Step 11: Run Your App
Run the app on an iOS Simulator or device. Test the following features:
- You can restart the app at the end of the drink flow.
- You can restart the flow if you say no to a drink
- View the drink layers as they should be.
What’s Next?
Here are some ideas to expand the app:
- Add More Extras: Include options like cinnamon, honey, or sugar cubes.
- Animate the Cup: Add animations to the drink preparation process.
- Save Preferences: Allow users to save their favorite combinations.
🎉 Congratulations! You’ve built a dynamic and interactive Hot Drink Customizer App. Here’s to the last day of #The12DaysOfSwiftmas tomorrow! ☕
